

Cloud IO! Error security
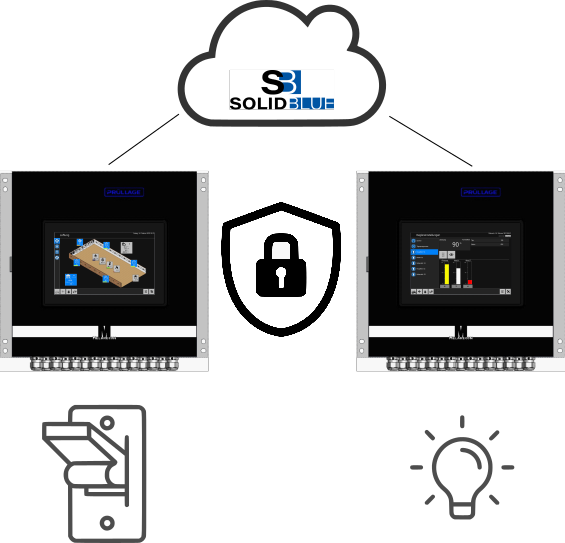
In this third part of the series “Cloud IO!” an example shows which security measures are available. In the second part Cloud IO! Use as hardware, it was shown how a digital input state can be transferred to the cloud using a digital output and how it can be used and assigned to another device as a digital input as a real hardware state in an existing program. But now the question arises what actually happens if the Internet connection is no longer available for a short time. In this case, the input state would be uncertain on the second device and if a drive is controlled here, it should switch off to be on the safe side. Various setting options have been implemented for this purpose, which are presented below.
Connection state object
On the transmitter device, i.e. the first MELARECON, create a new subscription with the topic “Test/Toggle” on the initial topic of the MELARECON. How this works has already been shown several times in the first two parts of this series. This new subscription is given the ID 11 on my device. Remember your new ID again. Now switch to the “Connection state object” dialog and set the “Enable cyclical sending toggle” option. After activation, further settings become visible:
- Associated subscription nb.: Enter your ID for the new topic here (it was 11 for me).
- Cycle time for sending: Here you can set a time in milliseconds. The toggle is changed by in the interval set here. A 0 or a 1 is alternately written to the topic.
- Enable monitoring: If the transfer of the toggle is to be monitored on this device, you can enable this by activating this option. Further settings are now visible:
- Maximum time feedback toggle: If the toggle is described, the subscription also ensures that the sent value is also received. Here you can set the maximum time for this feedback.
- Maximum time communication is established: The toggle is only sent after the communication has been successfully established. You can use this setting to monitor the communication setup.
- Maximum time communication abort message: It can happen again and again that communication breaks off at short notice. This setting allows you to slightly delay the notification after a loss of communication.
- Maximum time feedback core: The transmission is not carried out by the control process, but by the core process. This also sends a toggle to the control process. This time until the next toggle can also be monitored.
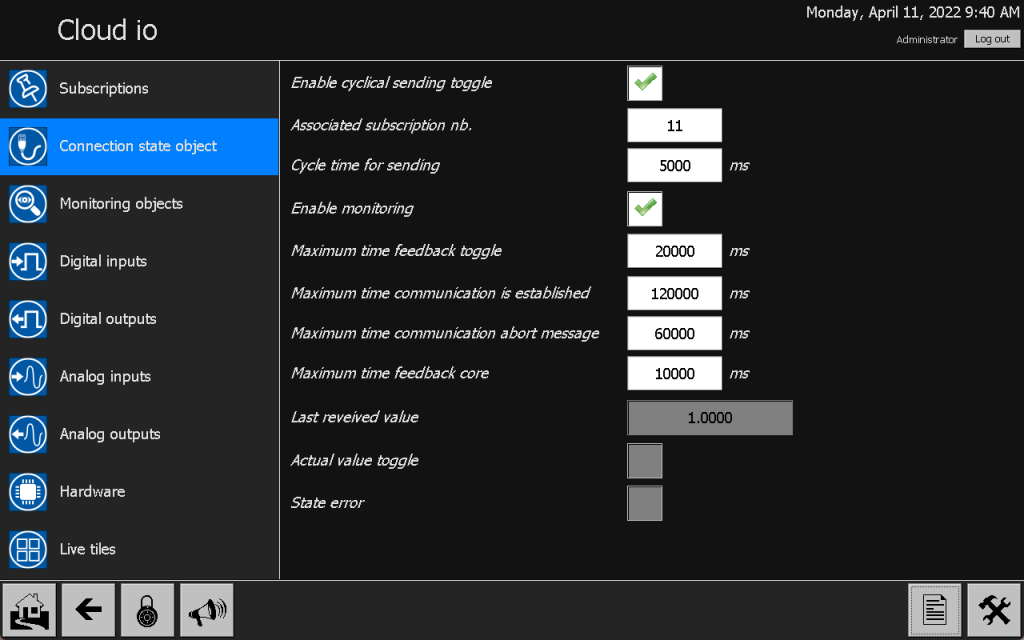
With the connection state object, a toggle bit with the states 0 and 1 can be transmitted on a topic with any ID. It can be monitored accordingly whether the toggle was transmitted correctly and whether the communication was established properly. However, an error is only reported if a digital or analog input or output has also activated the monitoring.
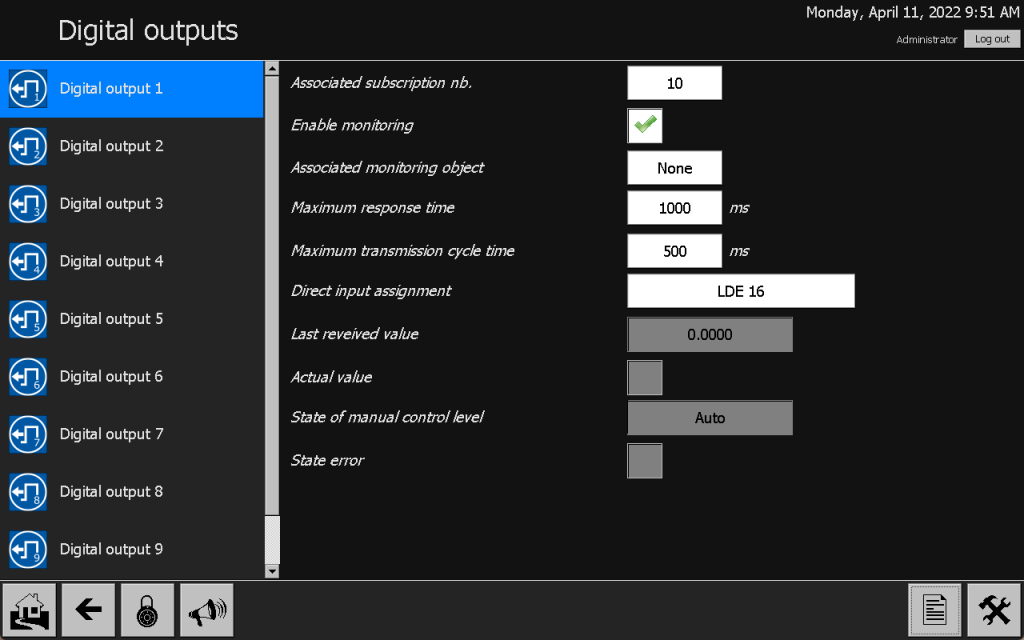
So if you want to receive a error message on the transmitter device, you have to activate the monitoring on our digital output. So switch to digital output 1 and set the “Enable monitoring” option. By setting this option, an error in the connection state object automatically leads to an error message. Further settings are also visible:
- Associated monitoring object: We don’t need this setting here for now.
- Maximum response time: The transmitted state of our button can also be monitored again through the subscription. The maximum feedback time can be set here.
Now switch to the second MELARECON device, which receives the state of the button as a digital input. Activate the “Enable Monitoring” function in the connection state object dialog there as well. It is not necessary to send another toggle here.
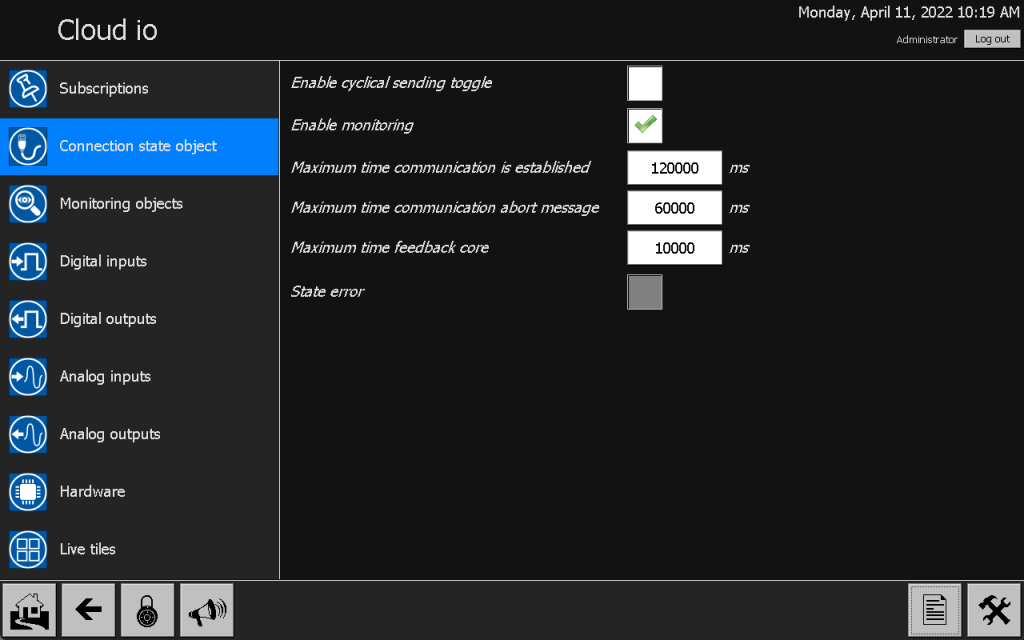
With this setting, correct communication is also monitored on the second device.
Monitoring objects
A toggle bit of another device can be monitored with a monitoring object. To do this, however, you must first create a corresponding subscription. Switch to the “Subscriptions” dialog on the second MELARECON device and create exactly the topic there to which the toggle will be published on the first device. Again, when creating the topic, make sure you enter the full topic name and disable the initial topic option. Remember the new ID of the topic again. ID 2 is used on my device. Furthermore, you should already be able to see the state displayed on new subscription changes between the values 0 and 1 every five seconds.
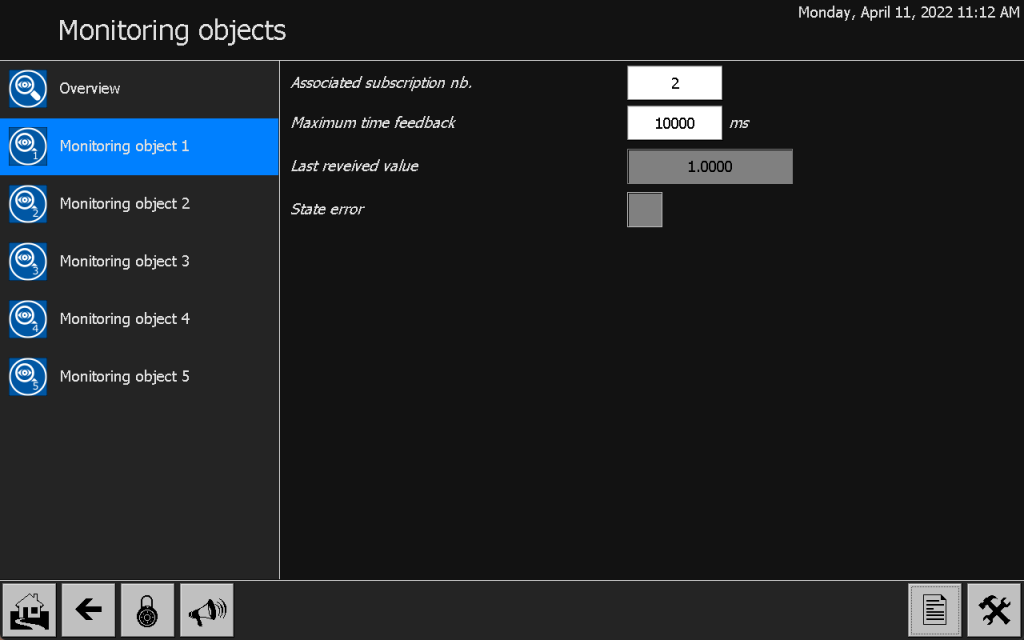
Now switch to the “Monitoring objects” dialog and select “Monitoring object 1”. Under the setting “Associated subscription nb.” select the ID of the topic you just created (it’s 2 for me). With the “Maximum time feedback” setting, the time in which the toggle must be received can be specified again.
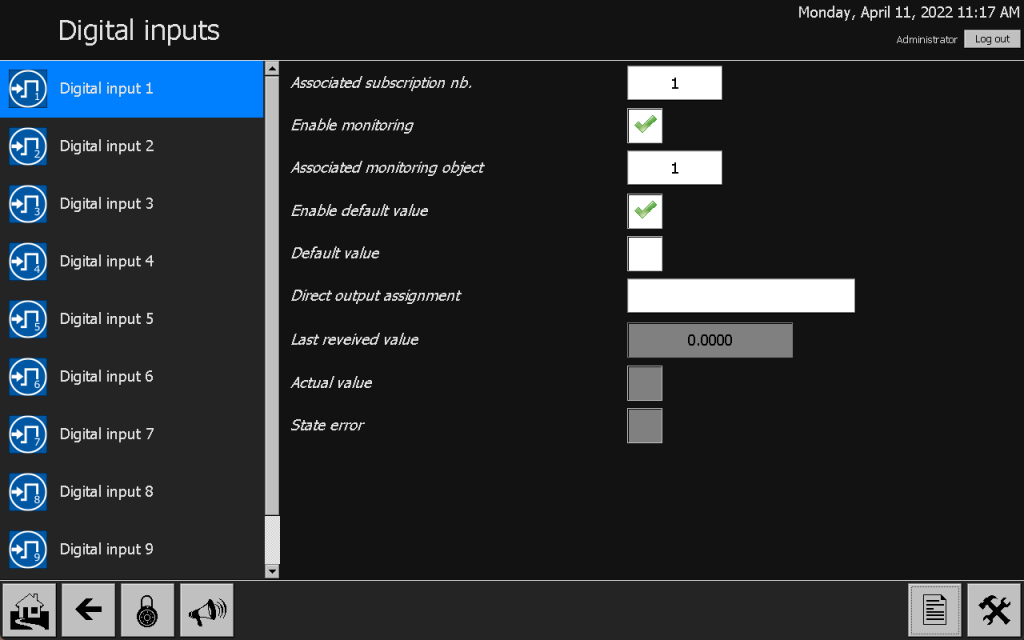
As a last step, switch to the “Digital input 1” dialog, with which the state of the button is already received from the first device. Activate the “Enable monitoring” setting. As explained above, new settings are also visible here:
- Associated monitoring object: Enter the number of the monitoring object here. We have set monitoring object 1 accordingly, which we also want to select here. So set to 1.
By enabling the monitoring, the state of the connection state object leads to a fault. With the entry of the monitoring object, there is also a reaction to the absence of the toggle. In the second part, I deliberately skipped the “Enable default value” setting. Activate this now. Another setting is now visible. With the “Default value” setting, you can specify the state value of the input in the event of an error. If an error occurs in the communication, this setting can be used to determine the state of the digital input. I leave the option blank. This means that if there is a communication error, the input state will be 0. A drive connected here is therefore switched off in any case.
Summary
With the last part of the series “Cloud IO!” it has now been shown how flexible the setting options are and how a wide variety of application scenarios can be formed as a result. With cloud IO, process data can be exchanged regardless of manufacturer and location. System security can still be configured in the event of communication errors. If there is a fault, the message “Cloud io error” is triggered. In such a case, states of digital or analog inputs can be specified.
If you have any further questions on this topic or are interested in using the MELARECON for your applications, just get in touch with us.